I will focus my exploration on BeeClip EDU as BeeClip is not to be used by anyone under the age of 16. Please read the inclusive terms of service and a privacy policy which users are required to observe. BeeClip EDU is a company registered in England and Wales.
Persons under the age of 16 using this site must have the prior explicit permission of a parent, guardian or school teacher. (In the United States this age would probably be 13 in accordance with our laws.) Scrapbooks created by students within BeeClip EDU are by default private to the user, their classmates and teacher. A teacher can enable a feature so scrapbooks by students can be embedded outside the BeeClip EDU space.
In their about section BeeClip EDU states:
Our two main goals are to save teachers time and empower student creativity.
Some general observations are: all student work is contained in what BeeClip EDU calls a walled garden, collaboration between students can only be done if they are in the same class (click on the Editors button at the top of the screen on the right), a tool called a Beeclipper can be installed in favorites to easily clip items for a scrapbook, and BeeClip EDU works best if Adobe Flash Player 10+ is installed on your computer.

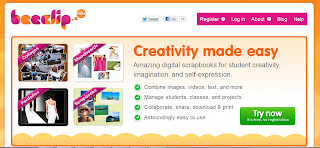
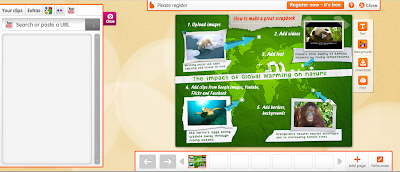
To begin I clicked on the green Try now button. A seven slide overlay is placed over the work surface as an introduction. Your clips (uploaded or gathered) will appear to the left of the workspace when that tab is clicked. To place them in a scrapbook, simply drag them over.
Extras, template backgrounds for pages, can be added to make the scrapbook more visually appealing and personal. On the right icons representing the addition of all kinds of text, background colors, and download or print pages, are options. More tabs next to Your clips and Extras on the left provide users with the ability to search Google for images, import photos from Flickr or search and paste in a URL from YouTube.
 I decided to design a series of pages around a focus on books, reading and libraries from books I had at home. First I needed to delete all the items on the introductory page. Second I did a Google image search for a book cover. Once found I selected it with a click. I could then place it on the scrapbook page by dragging it and I could also place it in the Your clips folder by dragging it to that tab.
An image or video placed on a page can be brought forward, sent back, deleted or used as the entire background. If a border has been added (from the Extras) it can be removed. The item can be sized through the use of the dots and squares on the perimeter or rotated by clicking on the green dot and turning with your mouse. A text box cannot have a border added.
[I found the best way to continue was to register. To register you need to select a display name, user name, password and email address. In order to create a scrapbook you need a project. A project can only be created if you have a class. For purposes of exploring this site Xena, my Warrior Princess, chocolate lab, became a student. Teachers upon registering are given a unique registration code so students can register on their own.]
Once I created a project platform I could add a scrapbook. (This was much better than playing around with the pre-registration introductory page.)
When you begin you are asked to choose a style: none, collage, portfolio, photo album, scrapbook or moodboard. From there a double box space appears. On the left images can be uploaded or found when searching. They are then dragged to the right side.
Once you have completed this second step you are taken to the screen which originally appeared when you explored the site without registration. Changing backgrounds is as easy as finding one in Extras and dragging it over to the page. Pages can be added with a click. At the bottom of the working area all created pages are displayed; so you can toggle back and forth making changes as necessary by clicking on a specific page.
When the scrapbook is completed it can be viewed by all the students within your class. To control what students (and you) can do with the created scrapbooks go to Project Settings in the upper right hand corner of your project view (go to dashboard first). From there you can determine with a yes or no selection about the use of comments, embedding, Google images, YouTube, and Flickr images.
I spent hours in BeeClip EDU; it was that much fun to use. There are small images, stickers, that can be added to each page which I found could be used as a backgroud for text. Any time a scrapbook has been completed it can still be edited by clicking on the tab in the upper right hand corner of the pages. This is a very new release with huge educational potential.


No comments:
Post a Comment