Mural.ly states in their Terms of Use Agreement they area robust platform for visual collaboration and problem solving. Murals ("Murals") are web pages that are like scrolling/zoomable whiteboards.
The site will have three options for accounts: free, premium and business. It is not designed for children under the age of thirteen but in the Terms of Use Agreement they do say:
Accordingly, in order to use the Services, you must notify parents/guardians of the information to be collected from children under the age of 13 and obtain consent from the parent/guardian prior to collecting and sharing such information.
On the home page Mural.ly provides access to several sample Murals, collaboration ideas, testimonials from users and their blog for updates about the service. To begin click on the bright pink Sign-up for free button. You are asked to give your email address, a username and password. You can use either your Facebook, Twitter or Google account to sign-up also.
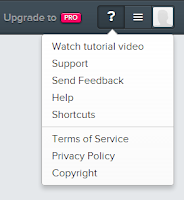
 Upon signing-up a new window appears, your Home page. Across the top a bar designates possible actions, specifically in the right-hand corner. The first icon offers links to an FAQ, a list of keyboard shortcuts and anything someone new would need to know about the service. Moving to the left, any notifications will be posted there. The final icon is where your settings can be established and you logout.
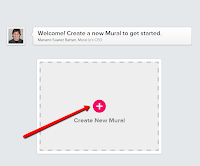
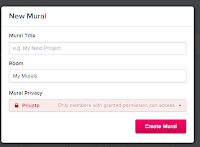
 When you select the plus sign in the center of the page a new window is superimposed on top of the work space. You give your Mural a title, a place to be stored on the site and determine whether it will be private (indoor Mural) or public (outdoor Mural). If it is private only those with granted permission can access the Mural.
Upon choosing Create Mural another window asks if you want to add people via email invitation to participate in the making of your Mural. For the purpose of this post I skipped it. A short one minute plus video comes on the screen next advising you how to DRAG AND DROP CONTENT SUPER FAST.
When you close the video your work space appears. In the upper left-hand corner a series of icons, left to right, take you home, allow you to export the Mural by sharing or embedding, invite people, change the Mural members or settings, and actions such as duplicate, move to... and archive. The last icon on the left signifies that email notifications is on.
Along the left-hand side of the work space is your tool bar. From top to bottom you can add:
- web content using a URL
- images either by searching in Google images or uploading from your computer
- documents from Google Drive
- text in the form of titles, text boxes or sticky notes
- shapes (9)
- stickers, solid or full color, you can search by keyword for a specific item
- spaces (9), templates for layout and
- background (9).
In the lower right-hand corner and along the right side left to right, bottom to top you can:
- comment
- see the online users
- view the Mural activity (all your current actions, comments and mentions)
- chat
- see your position on the Mural with the red rectangle
- toggle to full screen mode
- zoom in and out
- move the screen left, right, top and bottom
 When you select add web content the work space changes color giving you additional instructions. After you add the URL, the item will appear below giving you a preview of how it will appear on the Mural. Options appear around and inside the item when it is dragged to the Mural.
 You can change the title and the description of the web content. The thumbnail can be changed or deleted. You can add your own image if you like. The entire box can be dragged to a new position, rotated, resized or you can:
- add a comment
- duplicate it
- open the preview
- lock it
- bring it to the front
- send it to the back
- edit it or
- delete it.
At any time during your work on the Mural you can double-click on any spot to add text instantly. You can also frame specific areas of your Mural (click on the 1, 2, 3 circles on the bottom of the tool bar on the left) to direct viewers from one area to the next. If you lock an item on your Mural right mouse click to unlock it as well as adding a comment, open preview, bring to the front, and send to the back.
 Upon completion of the Mural, go to the top and click on the Export button. You can get a URL link or an HTML embed code. Your entire Mural has a link and each individual item has its own link.
Mural.ly is an amazing new web 2.0 application with endless possibilities. The results are sharp and clean but it is very easy to use. I would highly recommend placing this in your virtual toolbox.
Here is a link to my Mural.ly about events during the month of April. To activate any of the links simply double click.


No comments:
Post a Comment