
On site Pixorial states:
We exist to make it easy for you to collect, create and share your video memories.
Some of the features are:
- 7GB of space/cloud storage
- easy-to-use movie creator tools
- upload videos from any camera; supporting a variety of formats
- easy sharing on several social networks like Facebook, Twitter or YouTube
- phone and tablet app; iOS and Android
- free one year expanded account for educators (Pro)(student 7GB accounts are free)
- east-to-understand tutorials
- 500 music tracks
- Google Drive sync
- additional pricing for upgraded accounts
It states specifically in the Terms of Service users need to be 13 years of age. You can sign in using your Google or Facebook account or by entering in your email address, a password and accepting the Terms of Service and Privacy Policy. A welcoming email is sent immediately.
 The next screen is your work space. On the right-hand side of the screen are all those items available to assist in the making of your videos as well as accessing your account settings and management options and for logging out. In the center is where your videos in your library will appear as you work on them. To the left is the organizational center for your videos and the ability to search.
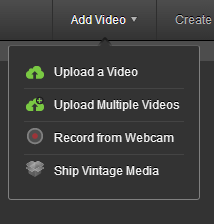
The first thing you need to do is add a video to Pixorial. You can upload a video from your computer, use your webcam to record video, use the provided mobile apps or ship video to them for conversion if it is vintage. Move to the center of the screen and select the Add Video button. Your choices appear in a drop-down menu.
 I decided to be brave and record from my webcam. I made two separate videos (Two takes on one, one take on the other. Mr. Schu and Mr. Sharp would be proud of me.) which when processed appeared in the center of the screen. Any videos in your library can be edited or incorporated into another video.
When you click on any of the videos the options on the right side of the screen change. Now you can view, download, edit or delete the selected video. Share video, send a video card, create a DVD, share video on social sites and link to video are additional choices under the actions tab. There is an info tab (title, date and place) and a comments tab.


I next selected Create Movie. An entirely new screen shifts into place asking you to add a video. I added one of mine. It appeared in the larger gray section beneath the preview box at the top.
 Choosing overlay text gives you the options of font, style and duration. When overlay credits is selected the same choices appear except for scrolling speed instead of duration. I moved down to the next step which is Music Track, Add Song. You can upload a tune or choose from their large music library. Music can be previewed before adding.
After adding any text, credits and music, preview your video. You can delete, undo, redo, save, save as and finalize movie. When you select save, as I did, it then asks you to title your movie.
In selecting Final Video your movie is processed, appearing in your video library in the center of the screen. At this point click on the video to view the choices again for sharing your video. (This can be done from this list on the right or by clicking Actions at the top of the screen. Share video provides you with a link to email to friends for viewing or even editing. You can create a list of email addresses.
Send a card embeds your video in any one of a variety of templates provided by Pixorial. This can be sent via email. Pixorial's Create a DVD generates a label for your DVD from a series of templates. (There is a cost for this.) Share a video on social sites allows you to add more sites for sharing. Choosing Link to video provides the means to edit the title, an HTML code for embedding and a URL link.
Here is the movie I created. My hat is off to Mr. Schu and Mr. Sharp for making their Newbery Challenge videos each week. Here is the link to the site to view my video.
For someone with zero experience in making a movie I found Pixorial's ease of use to be exemplary. Every time a selection is made the instructions are clear making editing and creating a video very user-friendly. I plan on using this more often, trying a video from my phone next and recording a video directly from my webcam, then uploading to get a more finished looking movie.
No comments:
Post a Comment